CALL TODAY! → (682) 459-8761
Texture Matching: How to Blend Drywall Seamlessly
Find out how texture matching ensures seamless drywall repairs and renovations by perfectly blending new and existing wall textures.
2/11/20253 min read

Introduction
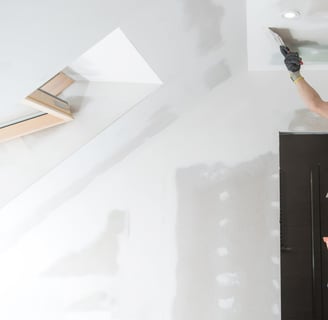
Have you ever walked into a room and noticed a patch of drywall that doesn’t quite match the rest of the wall? Whether due to repairs, renovations, or extensions, texture mismatches can make walls look uneven and unprofessional. This is where texture matching comes in! The goal is to seamlessly blend new drywall with existing textures, making the transition invisible.
At E&C Drywall LLC, we specialize in precise texture matching, ensuring your walls look consistent and polished. In this blog, we’ll walk you through the process, common texture types, and why hiring a professional makes all the difference.
What is Texture Matching?
Texture matching is the art of recreating an existing wall or ceiling texture so that repairs or new installations blend perfectly with the surrounding area. This requires skill, experience, and the right tools to achieve a uniform look.
Drywall textures not only add visual appeal, but they also help conceal imperfections. When repairing a section of drywall or adding a new wall, it’s crucial to match the texture accurately so it doesn’t stand out.
Common Drywall Textures and How We Match Them
Every wall texture is different, and each requires a specific technique. Here are some of the most common textures we match:
1. Orange Peel Texture
🔹 What It Looks Like: A subtle, bumpy texture that resembles the skin of an orange.
🔹 How We Match It: We use a spray gun to apply fine, medium, or heavy coats, depending on the original texture. The pattern is adjusted for a seamless blend.
2. Knockdown Texture
🔹 What It Looks Like: A textured surface with a flattened, stucco-like appearance.
🔹 How We Match It: We spray the compound onto the wall and use a trowel to lightly “knock down” the texture, creating a consistent pattern with the surrounding walls.
3. Popcorn Texture
🔹 What It Looks Like: A thick, rough, bumpy texture commonly found on ceilings.
🔹 How We Match It: Popcorn texture is applied using a hopper gun with a mixture of joint compound and texture additives to replicate the original look.
4. Sand Texture
🔹 What It Looks Like: A fine, grainy texture that gives walls a slightly rough feel.
🔹 How We Match It: Sand is mixed into the joint compound and carefully spread onto the surface to match the original pattern.
5. Venetian Plaster
🔹 What It Looks Like: A luxurious, smooth yet textured finish with a marbled effect.
🔹 How We Match It: This requires a multi-layer plaster application with a trowel, followed by polishing to achieve the same depth and sheen as the existing surface.
Step-by-Step Process of Texture Matching
1. Evaluating the Existing Texture
First, we closely examine the pattern, thickness, and application method of the original texture. This helps us determine the best approach to match it accurately.
2. Prepping the Surface
We prepare the area by sanding rough edges, cleaning the surface, and applying a bonding primer if necessary. This ensures the new texture adheres correctly.
3. Creating a Test Sample
Before applying texture to the wall, we test a small patch on a separate board or hidden area. This helps us fine-tune the technique and make any necessary adjustments.
4. Applying the Texture
Using specialized tools like sprayers, trowels, or rollers, we carefully apply the texture to match the existing surface.
5. Blending and Drying
Once applied, we feather the edges to blend the new texture into the surrounding wall. After it dries, we assess the results and make final refinements.
Why is Texture Matching Important?
✔ Ensures seamless blending of new and old surfaces
✔ Eliminates noticeable drywall patches
✔ Maintains the aesthetic appeal of your home
✔ Increases property value by keeping walls uniform
Without proper texture matching, repaired sections of drywall will stand out, making the wall look unfinished or unprofessional.
Common Texture Matching Mistakes (And How We Avoid Them!)
❌ Using the Wrong Application Method: Spraying when the original texture was hand-applied can lead to mismatched results. We identify the correct method before applying.
❌ Skipping the Test Patch: Some try to apply texture directly onto the wall without testing first. We always do a test sample to ensure a perfect match.
❌ Not Blending the Edges Properly: Hard edges can make the new texture stand out. We feather the texture to create a natural transition.
❌ Applying Too Much or Too Little Texture: We adjust the texture layer by layer to match the exact depth and density.
FAQs About Texture Matching
1. How long does texture matching take?
Most jobs take a few hours to a full day, depending on the size and complexity of the texture.
2. Can I match drywall texture myself?
While DIY kits exist, achieving a perfect match requires skill, patience, and the right tools. Our professional service ensures an exact replication of your existing texture.
3. Can I paint over a newly matched texture?
Yes! However, it’s best to wait at least 24 hours before priming and painting to allow the texture to dry completely.
Why Choose E&C Drywall LLC for Texture Matching?
At E&C Drywall LLC, we understand the art and science of texture matching. Our team ensures:
✅ Flawless blending of new and old drywall
✅ Expert replication of any texture type
✅ High-quality materials and precise application
✅ Professional results that enhance your home’s value
EMAIL:
FOLLOW US ON SOCIAL MEDIA
SUBSCRIBE TO OUR NEWSLETTER
CALL:
HOURS:
Mon-Sat
9:00am-5:00pm
COPYRIGHT © 2025 E&C DRYWALL LLC.